
I am currently involved in a project building a medium scale Docker Swarm cluster. This cluster comprises both Linux and Windows worker nodes. This article is about how to provision a Windows Server 2019 Standard Version 1809 in IBM Cloud. I will write other articles about the Docker and Docker Swarm components that tie everything together into a very cool cluster.
I assume that you have already created an IBM Cloud account. If not, read my article IBM Cloud – Creating a Lite Account. I also assume that you understand cloud computing and you are looking to understand IBM Cloud better. This article contains many screenshots to help you understand the IBM Cloud dashboard and to get a better understanding of IBM Cloud’s features. This article series will go into detail about provisioning, securing, deploying, and accessing public shared virtual servers in IBM Cloud.
What is IBM Cloud?
IBM® Cloud is a platform that helps developers build and run modern apps and services. It provides developers with instant access to the compute and services they need to launch quickly, iterate continuously, and scale with success. With services across mobile, IoT, IBM Watson®, and more, IBM Cloud is an ideal platform to power the next wave of apps that thrive on data. (source).
IBM Cloud Virtual Server Instances (VSI)
IBM Cloud offers two types of infrastructure for virtual server instances. Classic infrastructure and VPC infrastructure.
Classic Infrastructure:
Classic infrastructure is IBM Cloud’s existing IaaS platform. This environment is best for lift and shift workloads so you can move applications quickly and keep the same architecture.
VPC Infrastructure:
VPC infrastructure is IBM Cloud’s new IaaS platform, based on software-defined networking and ideal for cloud-native applications.
Types of Virtual Servers
IBM Cloud offers four types of virtual servers for the classic infrastructure. Each type has a different availability, security, and pricing model.
Public Virtual Server
IBM-managed, multi-tenancy virtual server deployments.
Transient Virtual Server
IBM-managed, multi-tenancy virtual server deployments are offered at a reduced cost and are best suited for flexible workloads.
Reserved Virtual Server
IBM-managed, multi-tenancy virtual server deployments with guaranteed capacity for a contract term.
Dedicated Virtual Server
IBM-managed, single-tenancy virtual server deployments
In this article, we will create a new public virtual server instance in the classic infrastructure. In future articles, I will cover VPCs and VPC infrastructure.
Step 1: Log in to IBM Cloud
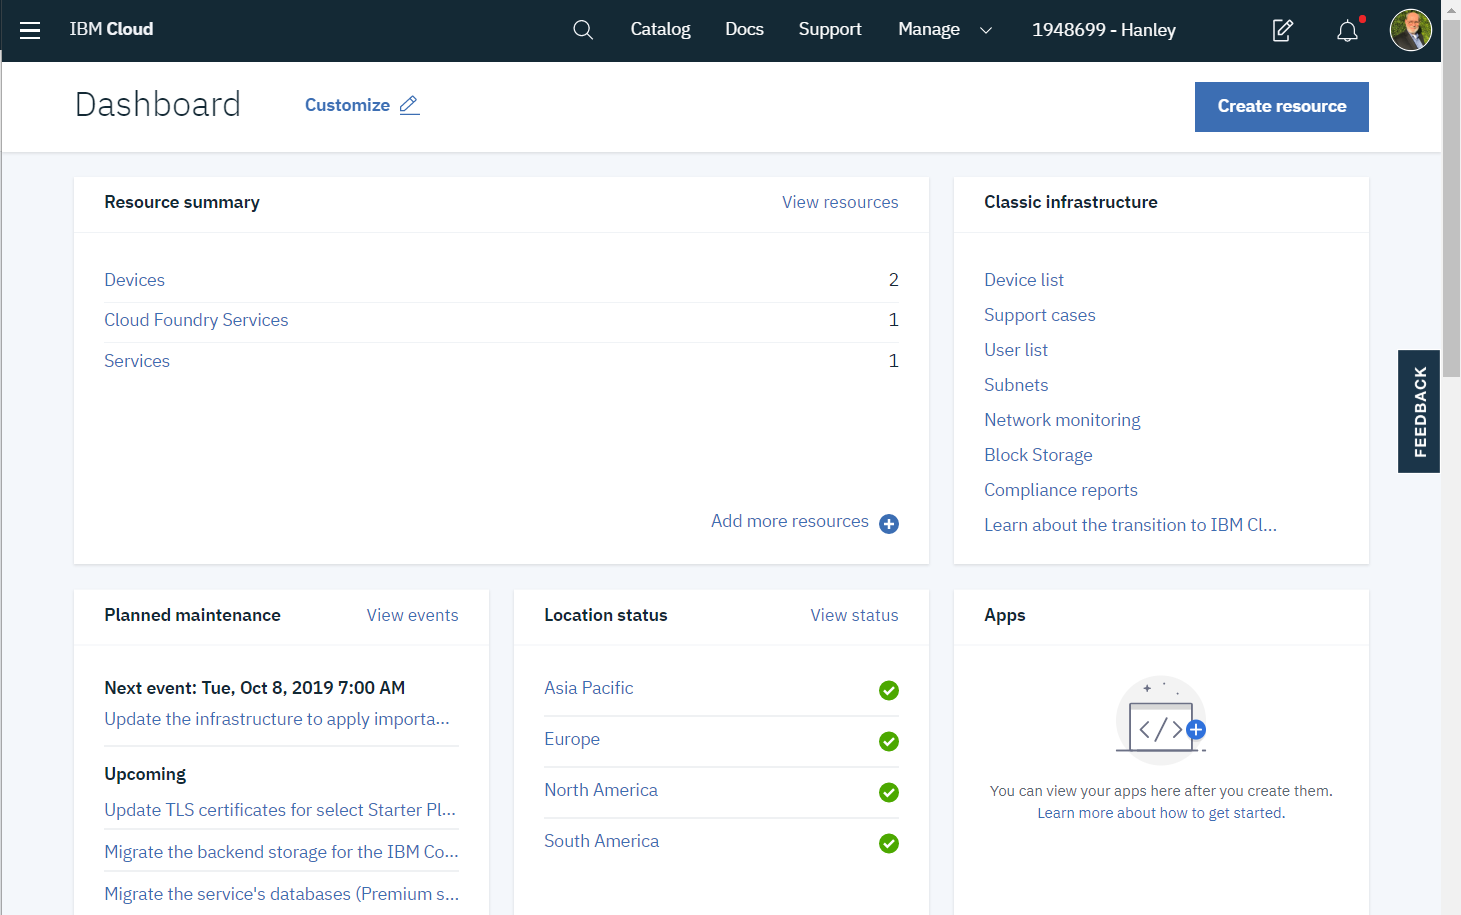
Go to the IBM Cloud console and login. This will take you to your dashboard where you can see your resources and other information. Spend some time becoming familiar with the various panels.
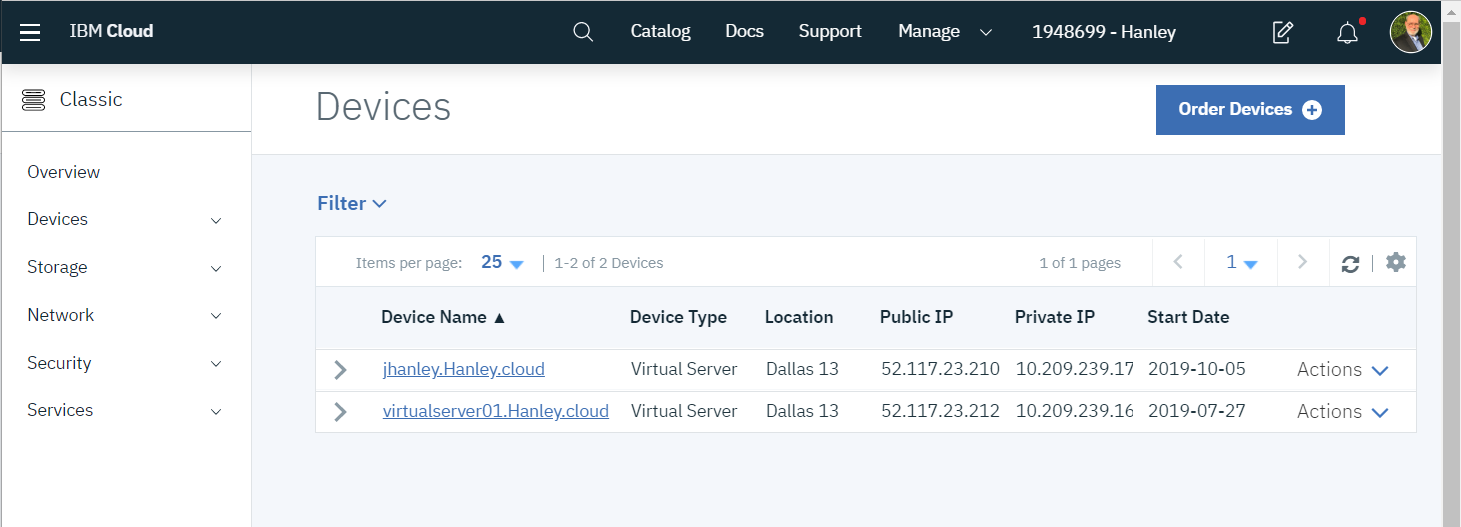
Step 2: Select Classic Infrastructure
Located at the top left of the dashboard is the hamburger menu button. Click this button and a menu will appear. Select Classic Infrastructure. This dashboard has a menu to the left and a listing of your virtual servers, which IBM calls “Devices”. IBM also calls the process of creating a virtual server “Order Devices”. Spend some time learning about the menu entries on the left side.
Step 3: Select the type of Virtual Server
Click the blue Order Devices button located at the top right of the dashboard. This will take you to the IBM Cloud Catalog.
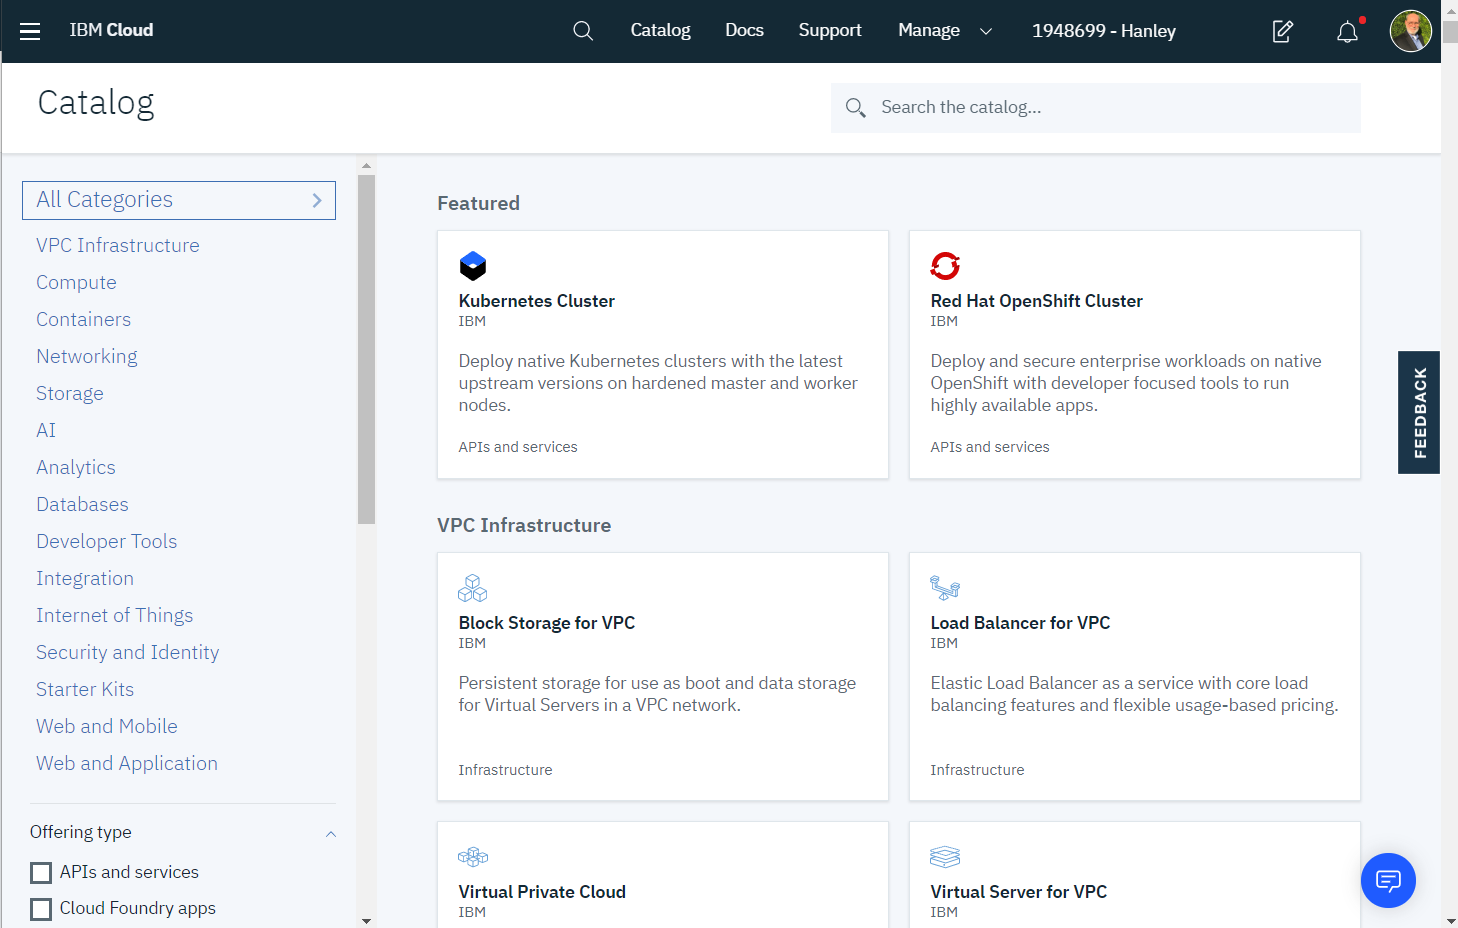
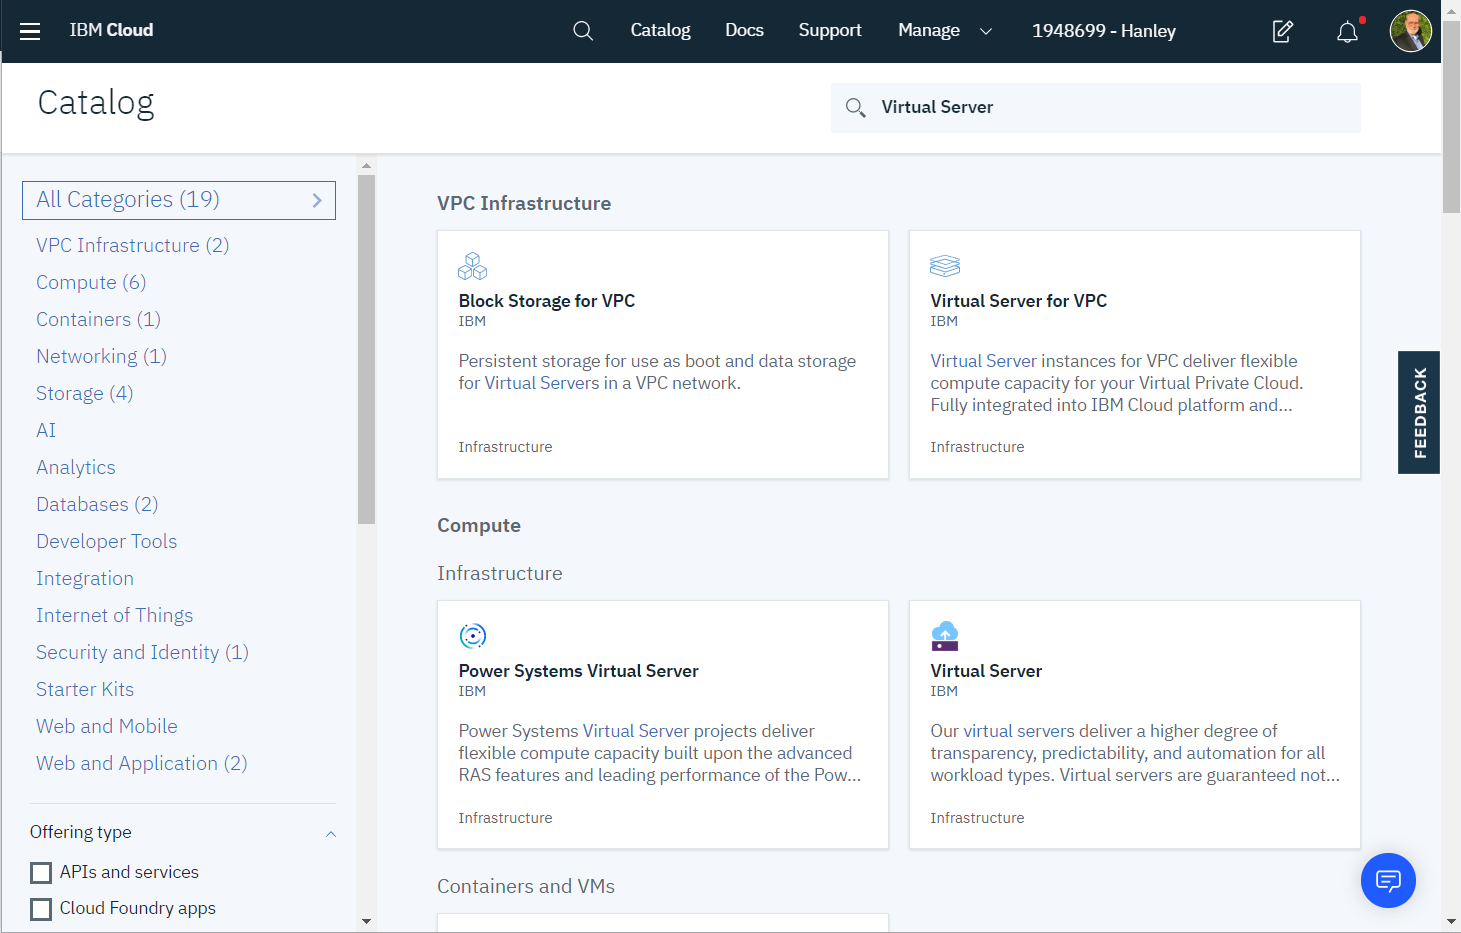
In the search box, enter “Virtual Server”. Several products will display. Notice the categories “VPC Infrastructure” and “Compute”. Notice “Virtual Server for VPC” and “Virtual Server”. Select “Virtual Server” as this product is for the classic infrastructure.
Another option is to select the menu “Compute” in the left menu and then select “Virtual Server”. Quick link: Virtual Server.
Step 4: Create Windows Server Instance
Scroll down, under Compute select Virtual Server. You should see a screen similar to this:
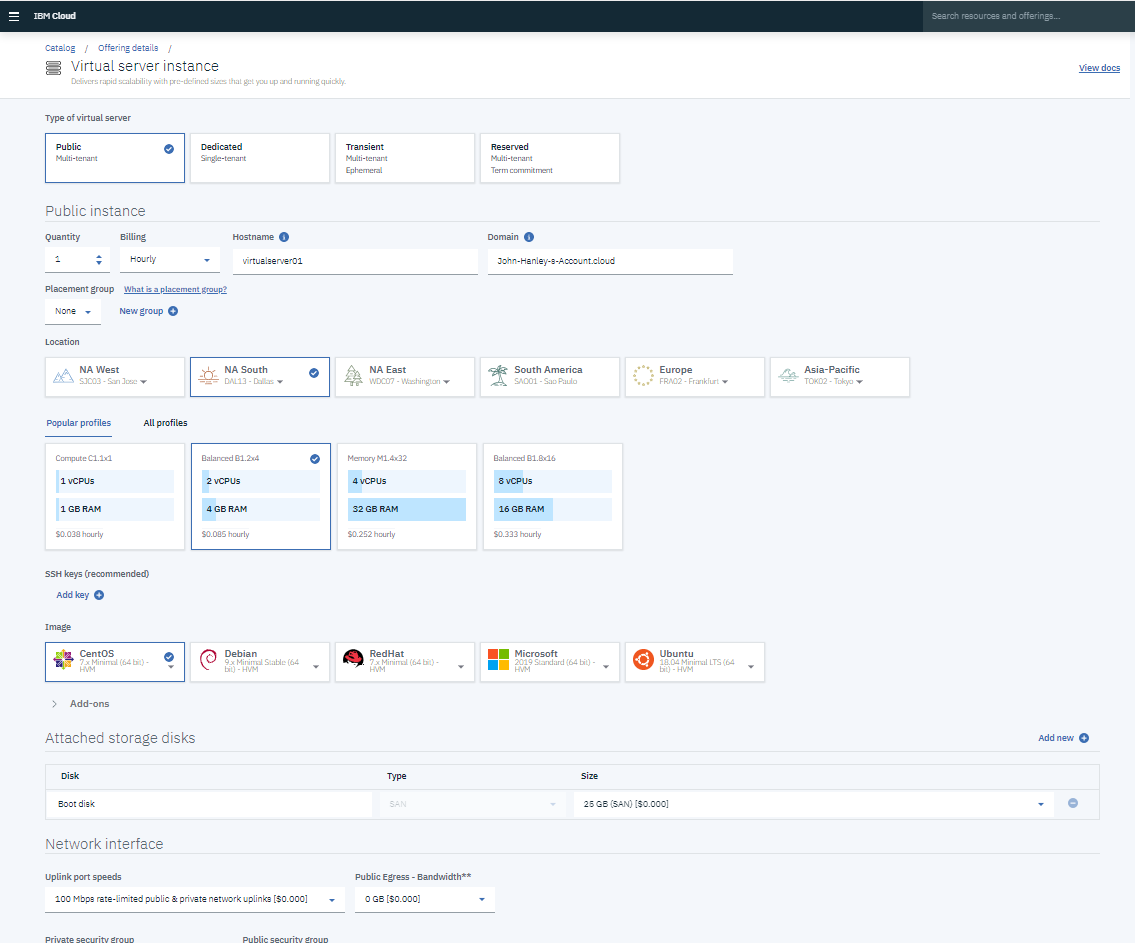
Select the following options:
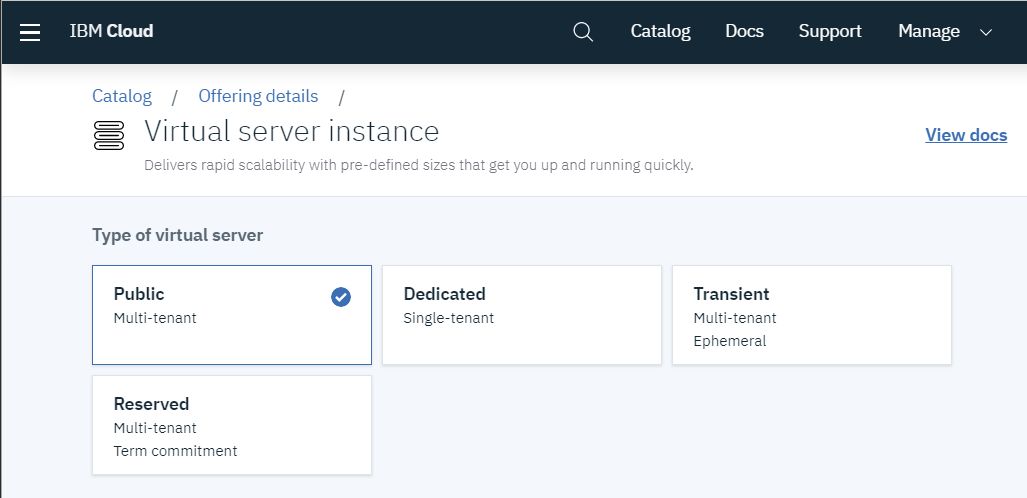
Type of virtual server
- Public – Multi-tenant
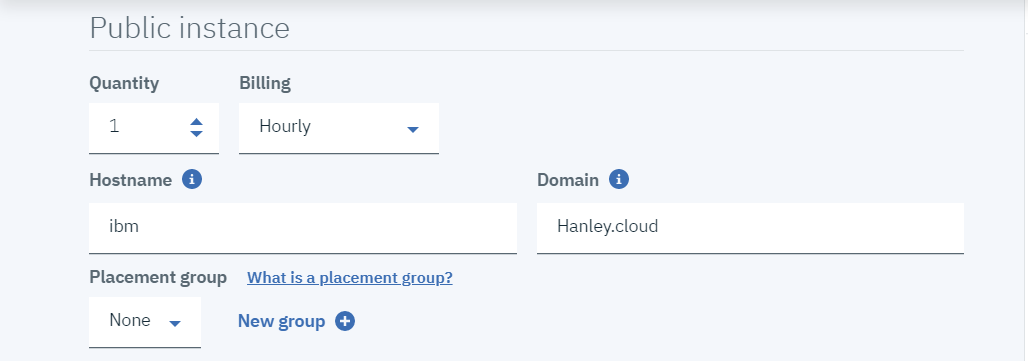
Public instance
- Quantity: 1
- Billing: Hourly
- Hostname: enter your preferred computer name. I am using
docker-win1. - Domain: This is a set of two or more labels and not a DNS domain. For example, enter “test.cloud”.
- Placement Group: select none.
Location
- Location: NA South. This is datacenter is located in North America South. You can fine-tune the selection to a specific datacenter in Dallas, Houston, or Mexico.

Profiles
- Select All Profiles.
- Select Memory. Select M1.1×8 or larger. Since this is a test server, I want to keep costs down. This instance size has one vCPU, 8 GB of RAM, and costs $.13 per hour or about $93.60 per month.

SSH keys
- SSH Keys. Select None
Image
- Select Microsoft 2019 Standard (64-bit) – HVM.
 Add-ons
- Expand Add-ons.
- Under services, select Advanced monitoring.
- Provision script: Leave as is
- User data: Leave as is

Attached storage disks
- The Boot disk is 100 GB which is fine for this server.

Network interface
- Uplink port speeds. Select 100 Mbps rate-limited public & private network uplinks. The other option is a 1,000 Mbps link for $0.04 per hour which is more than the price of the instance. For a production server, I would select the 1 Gigabit link.
- Public Egress – Bandwidth. I could not select an option. For more information go here. Each virtual server instance is allotted 250 GB per month at no additional charge. IBM Cloud offers bandwidth packages starting at 1 TB for $45.00 per month.
- Private security group. Select allow_all.
- Public security group. I previously set up a security group for SSH that only allows my home IP address. I will cover security groups in a different article. Review this IBM article Getting Started with Security Groups. For now, select:
- allow_traffic_from_office – )see my article on Security Groups)
- allow_outbound
- Private VLAN. Leave the selection at “Auto Assigned”.

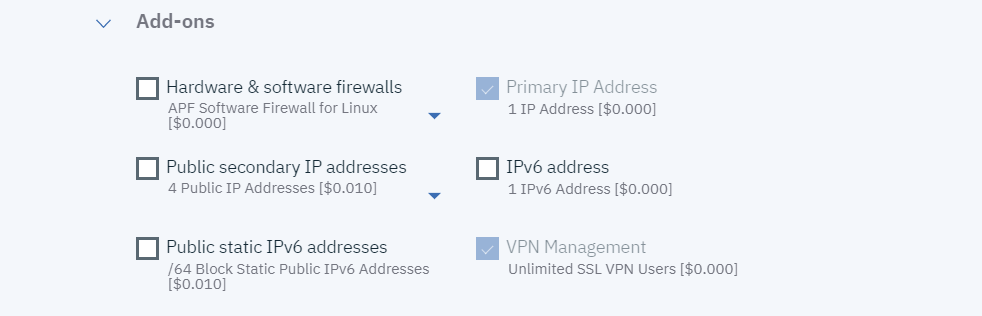
Add-ons
- Expand Add-ons. The instance comes with one Primary IP address. You can select additional IP addresses and IPv6 addresses.
Order Summary, Review and accept
- Double-check each selection.
- Click “I read and agree to the following Third-Party Service Agreements” checkbox.
- Click the blue Create button.

Summary
The instance took 33 minutes to launch. Wait a minute or so and go to the Passwords item in the left window. Under Username notice the user Administrator, under Password notice the “eye” icon. Click the icon and write down your password.
Launch Windows Remote Desktop to connect to the new instance. You will need the public IP address for the virtual server which can be found in the IBM Cloud Classic Dashboard.
|
1 |
mstsc /v:[IP_ADDRESS] |
Enter your username and password. You should now be connected to Windows as an Administrator.

Credits
I write free articles about technology. Recently, I learned about Pexels.com which provides free images. The image in this article is courtesy of Anthony at Pexels.

I design software for enterprise-class systems and data centers. My background is 30+ years in storage (SCSI, FC, iSCSI, disk arrays, imaging) virtualization. 20+ years in identity, security, and forensics.
For the past 14+ years, I have been working in the cloud (AWS, Azure, Google, Alibaba, IBM, Oracle) designing hybrid and multi-cloud software solutions. I am an MVP/GDE with several.
Leave a Reply